EQUIPMENT

Double check your equipment and cross-check it with our equipment list.  We’ll give you a couple more thoughts on gear, but at some point at least several days before your climb we recommend packing it all away so as to avoid the classic, last-minute flurry of packing, which inevitably results in some item getting left behind.

You’re no doubt familiar with layering, as it is the foundation of how we dress for the mountains.  The concept is that we carry clothes that we can use in combination so as to create a system that will keep us as comfortable as possible in any type of weather. A corollary to that theory is the concept that, “There is no such thing as cold weather, merely insufficient clothing.”  I’m not necessarily buying into that argument for a couple of reasons.  First, I’ve definitely been in some COLD weather.  -48F in a 60+ mile an hour storm at 17,000′ is just plain cold, no two ways about it.

We all have different comfort zones in the mountains!

Secondly, on an expedition, if you bring clothing sufficient to keep you warm in the above mentioned conditions, your pack will be so heavy that you’ll probably not even make it to 17,000 to experience them!  We just can’t plan on having the right layer or layers for every scenario, so let’s throw that secondary corollary out the window for our purposes on Aconcagua.

Your fitness level is a good insurance policy for staying warm on an expedition like Aconcagua.  If you find yourself chilled, keep walking or walk faster.  Fire up that inner furnace and your warmth will follow.  To make this work you’ll need to fuel the furnace, and keep the parts well lubricated, so EAT and DRINK regularly.  This is easy to manage on the lower mountain, but becomes increasingly challenging up high as your digestive system might slow a bit as your body adjusts to the increased altitude.

Our guides are very conscientious about reminding you to eat and drink.  They will do so with your best interest and success in mind, so don’t take it personally if they remind you a few times to finish that water bottle.  If you are a fan of drink mixes and have a favorite carbohydrate or electrolyte drink, bring a few packets along on the climb, as those comfort drinks might help you stay better hydrated on the upper mountain.  I’m a fan of the Nuun tablets, which are light weight and taste different from traditional mixes (Goji Berry anyone?).

The same advice goes for energy bars.  We’ll have plenty of food for you to choose from and you’ll be able to tailor your snack and lunch items from a broad selection we will provide in Mendoza, but we might not have your go-to uber-protein-carb-high-fructose-glycemic superman bar, so throw a few in your pack.  Similarly, we’ll probably not have replicas of your Aunt Annie’s Almond Cookies either, so if you need those for rallying, ask her to stock you up.

Guides’ Tip

– Many of us carry a couple of high caffeine “Gu” type packets with us.  These are not the most delectable, but give easily digested, quick energy in a light-weight package if you find yourself suddenly hitting a wall.

In a nutshell, layering in the mountains works only as good as your body will perform, and you need to tend to your body to get the most out of it.


Aconcagua is located in a very dry, sunny environment, and you’ll need to take special care to protect yourself from the sun.  Add in the notorious viento blanco (white wind) otherwise known as la escoba del Dios (the broom of God), pelting you with sand and occasionally pebbles, and you’ll find a recipe for painfully cracked and potentially deeply sunburned skin. 

As we mentioned in our previous email, you really need to hide from the sun down there.  Bring plenty of sunscreen for the trek in to base camp and use it liberally.  When you head up the mountain, bring at least two 1-ounce tubes with you.  The smaller tubes are easier to manage for many reasons, and allow you to have a back up in case one explodes.

Check one another at each break for signs of getting pink and also keep an eye on our guides, as we don’t want any of you to get fried.  On the hike, be sure to slather your hands as they are constantly exposed when holding trekking poles.  The webbing on the back of your hands between your thumb and fore finger is particularly vulnerable.  Wide brimmed hats work great, but many climbers pair a baseball hat with a bandanna or larger, lightweight scarf.  The new SPF Buffs are pretty slick as well.  Don’t be afraid to fully bundle up in Mujaheddin fashion.

Guides’ Tip-

Outdoor Research Helios Sunhat – Jaunty, adjustable, and SPF 50+.  This wide brimmed hat provides good coverage and has a stampede cord to keep it from blowing away in the wind.

Do your best to clean up each day.  Aconcagua is a dirty climb, and you’ll be amazed at how dark your ankles get from the dust and sand.  Keeping that layer of grime at a minimum is challenging, but you’ll have opportunities to rinse off on the hike in and can maintain a level of hygiene on the mountain by using moist towelettes (Handi-wipes) each evening.

Finger splits are endemic on Aconcagua.  If you are fortunate to not know what I’m referring to, they occur when dry skin at the tips of your fingers split, often along the whorls of your finger print, or down from the fingernail, fingertip interface (does that spot have a name?).  Keeping clean will help prevent this very painful phenomena, as will the application of some form of lotion or cream each evening.  A small tube of Super Glue or New Skin is the fix for these painful splits, but the application of the glue feels like someone just stuck a pin in it, so prevention is the best remedy.

Heels and feet are also abused by the sand and dust.  Gore-tex shoes and boots help a lot, and rinsing off in the river can also help.  Anytime you want to rinse somewhere, check with the guides first.  Don’t be “that guy” we saw bathing his… “parts” in our drinking water a decade ago.  Yuck!

Guides’ Tip – A half ounce vial of CND Spa Pedicure Cucumber Heel Therapy – OK- no chuckles from the peanut gallery.  This is a product a friend in the esthetician industry turned me on to and it really does a good job of keeping finger and heel splits at bay.  The small, 1/2 ounce size is easy to manage and is a nice bit of insurance.

Digital cameras have really changed how we shoot images in the mountains.  For less than a couple hundred bucks, you can get a camera that will shoot pictures that you can enlarge to small poster size and proudly display them, framed on your wall.  The key is to keep that camera happy so that when the time comes to shoot that amazing National Geographic quality shot, the camera will work for you. 

1.  Bring an extra battery (or two) and loads of memory.  Lithium-ion batteries are very lightweight and having battery life on summit day is worth the cost of an extra battery.  I bring two 16 GB memory cards so I have back up if one gets corrupted or lost and so that I can shoot all the video I’d ever want to subject friends and family to.The higher speed your card writes, the better, especially for modern cameras.

2.  Invest in a small, lightweight camera case.  I like the zippered pouch-style ones from Lowe Pro.  They have a small slot in the back for storing an extra memory card, and they have a velcro strap that I can easily attach and detach from the bottom of my pack’s shoulder strap.  The reality is that I mostly carry my camera in the thigh pocket of my soft shell pants, but the case is nice for storing it in the tent.  Put your camera in the case before you toss it into your tent, as this will help keep condensation due to temperature fluctuations off your camera body.  Keeping your camera dry will prevent the dreaded frozen camera syndrome that I keep hearing about, but have never experienced.

3.  SLR, Hybrid or compact?  This call is getting tougher to make, with the improvements in compact and sub-compact cameras.  I don’t carry my digital SLR on Aconcagua anymore, although there are times I wish I had my wide angle lens.  I’d recommend taking a lightweight camera with as much “optical zoom” as possible and a fairly wide angle lens, and then use the buckshot technique (shoot lots and lots and hope you hit something good).  Some point and shoot cameras are almost the equals of SLRs.  A guide favorite is the Canon G10 or the G11. The new, “Hybrid” cameras are very intriguing, although we are not personally familiar with any of them.  The Nikon J1 looks like a good option for big mountains, as it is relatively small, has interchangeable lenses and a built in flash.

4.  Rule of Thirds.  Divide your frame into thirds, be they horizontal or vertical and place your subject in one of the thirds at either end.  You can shoot dramatic images that really tell a story with this simple technique.

5.  Todd’s Toe Warmer Trick.  I bring one pair of disposable toe warmers for summit day.  These come with adhesive backing that I use to attach them to my camera, in such a way that they keep my battery warm.  This buys me 5 hours of battery life on even the coldest days.  If your camera doesn’t easily allow for this technique, stick the warmers to the inside of your camera case. Alternatively, dropping a hand warmer in your camera case (or pocket) with your camera will also help.

Camera batteries will last a long time, even in a cold environment IF you don’t use them when they are cold.  A cold battery will only give you a few shots when even a moderately warm one might give you a hundred.  Don’t keep your camera next to your skin, as this will cause moisture to get into it and will cause it to freeze.  A warm pocket or a warm camera case will ensure that you bring home some summit shots.

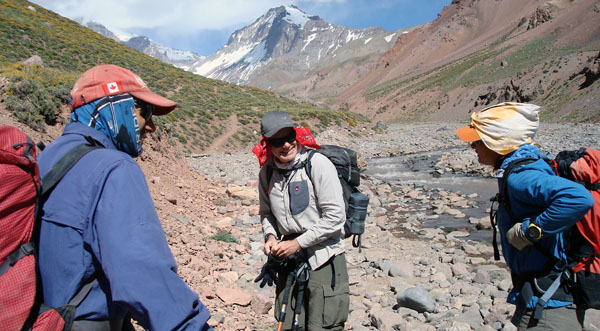
6.  Pass your camera to a friend.  If you are the only one to shoot pictures with your camera, your friends and family will be bored looking at all your teammates, who they do not know.  Pass your camera to the person on the rope in front of you and ask them to shoot loads of shots of you sauntering along with that monster pack!

Share Button